Mastering Precision: The Essential Role of Custom Silicon Carbide Measurement Tools
Share
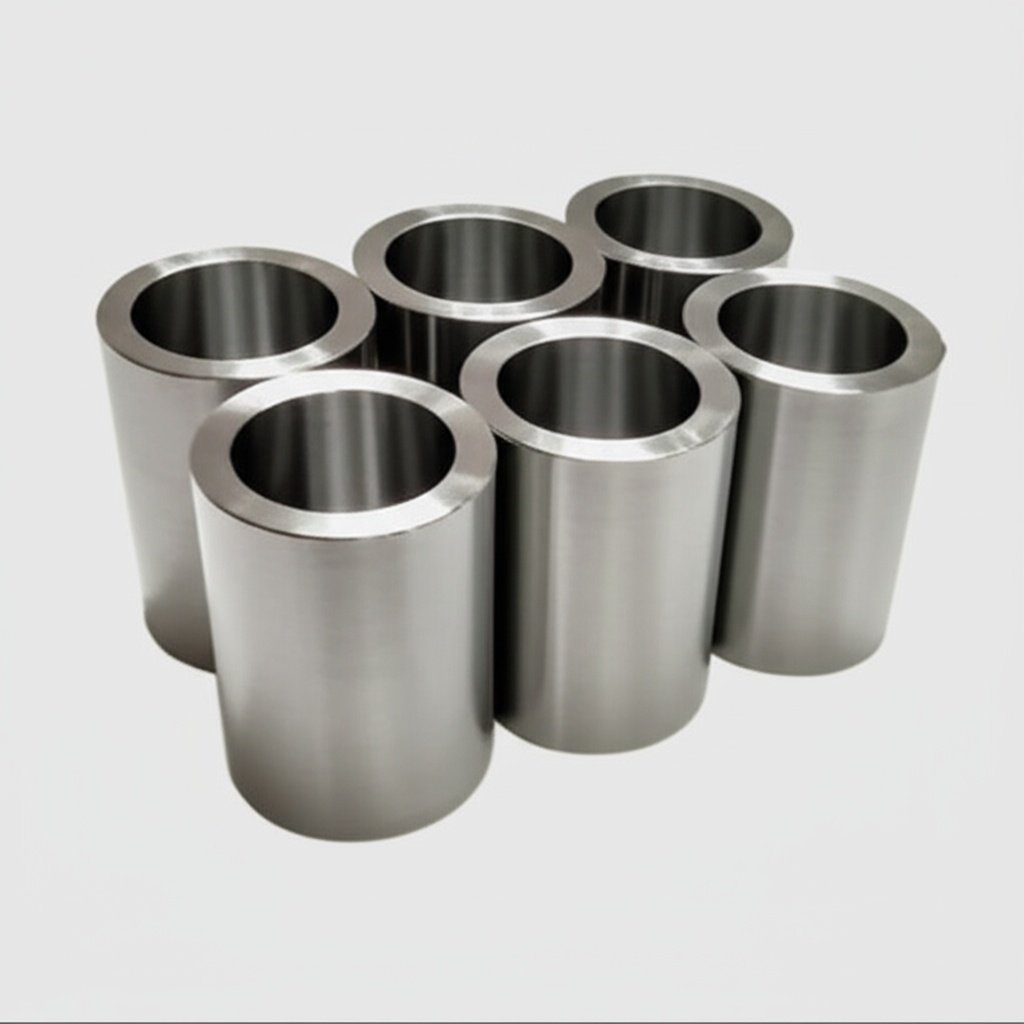
In the relentless pursuit of accuracy and reliability across high-performance industrial applications, the materials chosen for measurement tools are as critical as the measurements themselves. Silicon carbide (SiC), a formidable technical ceramic, has emerged as a cornerstone material for custom silicon carbide measurement tools. These tools are not off-the-shelf solutions; they are meticulously engineered components designed to meet the exacting demands of industries where even a micron of deviation can have significant consequences. From semiconductor wafer inspection to aerospace metrology and high-precision manufacturing, the unique properties of SiC make it indispensable for applications requiring unparalleled dimensional stability, stiffness, and resilience in challenging environments. This blog post delves into the world of custom SiC measurement tools, exploring their applications, the distinct advantages of customisation, material grades, design intricacies, and how to select a knowledgeable supplier like Sicarb Tech to ensure optimal performance and value. For engineers, procurement managers, and technical buyers, understanding the nuances of SiC in metrology is key to unlocking new levels of precision and efficiency.
Key Applications of SiC in Precision Measurement Tools
The exceptional combination of physical and thermal properties inherent in silicon carbide makes it an ideal candidate for a wide array of precision measurement tool components. Its utility spans across industries that demand the highest levels of accuracy and stability. In the semiconductor industry, for instance, SiC is crucial for manufacturing wafer chucks, inspection stages, and components for lithography systems. The material’s high stiffness and low thermal expansion ensure that wafers remain perfectly flat and dimensionally stable during critical processing and inspection steps, directly impacting chip yields and quality.
Aerospace and defense sectors rely on SiC for optical benches, mirror substrates for telescopes and satellite imaging systems, and reference structures in guidance systems. The lightweight nature of SiC, coupled with its superior rigidity (high Young’s modulus), allows for the construction of large yet stable optical assemblies that can withstand the harsh conditions of space or rapid G-force changes without distortion. This ensures consistent and reliable data acquisition.
In general industrial manufacturing and metrology, custom SiC components are found in coordinate measuring machine (CMM) arms, gauge blocks, master gauges, and precision fixtures. The wear resistance of SiC means these tools maintain their calibrated accuracy over extended periods, even with frequent use, reducing downtime and calibration costs. For applications involving high temperatures, such as in-situ process monitoring in furnaces or engines, SiC’s ability to maintain its properties at elevated temperatures is invaluable.
Here’s a look at some specific applications:
- Semiconductor Manufacturing:
- Vacuum chucks and electrostatic chucks for wafer handling
- Precision stages for steppers and scanners
- Components for EUV lithography systems
- Reticle stages and handlers
- Advanced ceramic components for chip inspection
- Optics and Photonics:
- Lightweight mirror substrates for telescopes and scientific instruments
- Optical benches and stable support structures
- Laser system components requiring high thermal stability
- SiC optical components for harsh environments
- Metrology and Calibration:
- CMM (Coordinate Measuring Machine) components (beams, bridges, quills)
- Master gauges and reference artifacts
- Air bearing components
- Precision straight edges and surface plates
- High stiffness ceramic calibration tools
- High-Temperature Environments:
- Measurement probes for furnaces
- Fixtures for thermal cycling tests
- Components for in-process monitoring in high-temperature manufacturing
The demand for OEM SiC components in these fields underscores the material’s critical role in advancing measurement technology and enabling next-generation innovations.
Advantages of Using Custom SiC for Measurement Tool Components
Opting for custom silicon carbide components in measurement tools offers a multitude of advantages over traditional materials like steel, aluminum, or even other ceramics. These benefits stem directly from SiC’s intrinsic material properties, which can be further optimized through tailored design and manufacturing processes. For technical procurement professionals and engineers, understanding these advantages is crucial for specifying materials that deliver long-term performance and value.
One of the most significant benefits is exceptional dimensional stability. Silicon carbide exhibits a very low coefficient of thermal expansion (CTE). This means that as temperatures fluctuate – a common occurrence in many industrial and laboratory settings – SiC components change size minimally. This stability is paramount for measurement tools where even minute thermal expansion or contraction can lead to inaccurate readings. Compared to metals, which can expand and contract significantly with temperature changes, SiC offers a far more stable reference.
High stiffness-to-weight ratio is another key advantage. SiC is remarkably stiff (high Young’s modulus) yet relatively lightweight. This allows for the design of measurement tool components that are rigid and resistant to deflection under load, while not being excessively heavy. For dynamic applications, such as moving CMM arms or fast-positioning stages, this translates to higher measurement speeds, reduced settling times, and improved overall system responsiveness without sacrificing accuracy.
Superior wear resistance is critical for components that experience friction or contact during operation, such as probe tips, guide rails, or reference surfaces. SiC is an extremely hard material, second only to diamond in many respects. This hardness means that SiC components resist abrasion, scratching, and wear far better than most other materials. This longevity translates into longer calibration intervals, reduced maintenance, and a lower total cost of ownership for industrial SiC measurement tools.
Chemical inertness and corrosion resistance make SiC suitable for use in harsh chemical environments or where contact with corrosive substances is possible. Unlike metals that can corrode or react, SiC maintains its integrity, ensuring that the measurement tool’s accuracy is not compromised by material degradation.
Furthermore, customization itself is a powerful advantage. By working with a specialized supplier like Sicarb Tech, measurement tools can be designed and manufactured to precise specifications. This includes complex geometries, integrated features (like vacuum channels or mounting points), and specific surface finishes tailored to the application. This level of customization ensures optimal performance that off-the-shelf components simply cannot match. Sicarb Tech, leveraging its deep expertise in technical ceramics manufacturing and its position within Weifang’s SiC industry hub, is adept at transforming complex customer requirements into high-performance, reliable SiC components.
Key Advantages Summary:
- Low Coefficient of Thermal Expansion (CTE): Minimizes dimensional changes with temperature, ensuring stable and accurate measurements.
- High Young’s Modulus (Stiffness): Provides exceptional rigidity, resisting deformation under load for precise readings.
- Excellent Hardness and Wear Resistance: Leads to longer component life, reduced need for recalibration, and lower maintenance costs.
- Good Thermal Conductivity: Allows for rapid temperature equalization, further enhancing dimensional stability in fluctuating thermal environments.
- Low Density (Lightweight): Enables faster dynamic response in moving systems (e.g., CMMs, scanners) without compromising stiffness.
- High Compressive Strength: Withstands significant loads without structural failure.
- Chemical Inertness: Resists corrosion and attack from most chemicals, suitable for harsh environments.
- Non-Magnetic: Beneficial for applications sensitive to magnetic interference.
- Machinability to Tight Tolerances (with specialized techniques): Allows for the creation of highly precise and complex shapes.
The combination of these properties makes custom SiC an unparalleled choice for high-precision ceramic parts in demanding measurement applications, offering significant improvements over conventional materials.
Recommended SiC Grades for Measurement Applications
Not all silicon carbide is created equal. Different manufacturing processes result in various grades of SiC, each with a unique set of properties that make them more or less suitable for specific measurement applications. Choosing the correct SiC grade is paramount for achieving the desired performance, longevity, and cost-effectiveness of custom measurement tool components. Procurement managers and engineers should work closely with their SiC supplier to select the optimal grade.
Sintered Silicon Carbide (SSiC): SSiC is produced by sintering fine SiC powder at very high temperatures (typically >2000∘C), often with the aid of non-oxide sintering aids like boron and carbon. This process results in a dense, single-phase SiC material with excellent purity (typically >98-99% SiC).
- Key Properties: Extremely high hardness, excellent wear resistance, superior chemical inertness, high thermal conductivity, and good strength at elevated temperatures. It also boasts a very low coefficient of thermal expansion, making it ideal for applications requiring supreme dimensional stability.
- Measurement Applications: Ideal for components requiring the highest precision and stability, such as CMM reference components, optical flats, mirror substrates, high-precision gauge blocks, air bearing surfaces, and critical parts in semiconductor metrology equipment. Its fine grain structure allows for excellent polished surface finishes.
- Considerations: Can be more challenging and costly to machine into complex shapes due to its hardness.
Reaction-Bonded Silicon Carbide (RBSiC or SiSiC): RBSiC, also known as Silicon Infiltrated Silicon Carbide (SiSiC), is manufactured by infiltrating a porous preform of SiC grains and carbon with molten silicon. The silicon reacts with the carbon to form new SiC, which bonds the original SiC grains. This results in a dense composite material containing SiC and some residual free silicon (typically 8-15%).
- Key Properties: Good mechanical strength, high hardness and wear resistance (though generally slightly lower than SSiC), excellent thermal shock resistance, and good thermal conductivity. It is generally easier and less expensive to produce complex shapes with RBSiC compared to SSiC.
- Measurement Applications: Suitable for larger structural components in measurement systems, precision fixtures, support structures for optical assemblies, wear-resistant guides, and components where high thermal conductivity is beneficial for temperature equalization. It’s a good choice for applications where cost-effectiveness for larger or more complex parts is a factor, without compromising significantly on key SiC benefits.
- Considerations: The presence of free silicon means it has a slightly lower maximum operating temperature compared to SSiC and may be less resistant to certain aggressive chemicals.
Nitride-Bonded Silicon Carbide (NBSiC): NBSiC is produced by bonding SiC grains using a silicon nitride (Si3N4) binder phase. This material offers good thermal shock resistance and mechanical strength.
- Key Properties: Good wear resistance, excellent thermal shock resistance, good strength.
- Measurement Applications: Less common for ultra-high precision measurement tools compared to SSiC or RBSiC, but can be used for kiln furniture supporting measurement devices in high-temperature processes or for components where extreme thermal cycling is a primary concern.
- Considerations: Properties can vary significantly based on the SiC grain size and the amount/type of nitride binder.
The table below provides a general comparison of these primary SiC grades relevant to measurement applications:
| Property | Sintered SiC (SSiC) | Reaction-Bonded SiC (RBSiC/SiSiC) | Nitride-Bonded SiC (NBSiC) |
|---|---|---|---|
| SiC Purity | Very High (>98%) | Moderate (SiC + Free Si) | Moderate (SiC + Si3N4) |
| Density | High (typically >3.1 g/cm³) | High (typically 3.0-3.1 g/cm³) | Moderate to High |
| Hardness | Extremely High | Very High | High |
| Stiffness (Young’s Modulus) | Very High (>400 GPa) | High ( ~350−390 GPa) | Moderate to High |
| Thermal Expansion (CTE) | Very Low | Low | Low |
| Thermal Conductivity | High to Very High | High | Moderate |
| Wear Resistance | Excellent | Very Good | Good |
| Chemical Resistance | Excellent | Good (affected by free Si) | Good |
| Max. Use Temperature | Very High | High (limited by free Si) | High |
| Cost of Complex Shapes | Higher | Moderate | Moderate |
| Typical Measurement Use | Ultra-precision references, optics, CMM parts | Structural CMM parts, fixtures, larger components | High-temp support fixtures |
Design and Manufacturing Considerations for SiC Measurement Tools
Designing and manufacturing custom silicon carbide measurement tools requires a specialized approach that accounts for the material’s unique properties, particularly its hardness and brittleness. While SiC offers exceptional performance, realizing its full potential hinges on careful design for manufacturability and precision machining techniques. Engineers and designers must collaborate closely with experienced SiC manufacturers like Sicarb Tech from the outset to ensure optimal outcomes.
Key Design Considerations:
- Simplicity and Manufacturability: While complex geometries are possible with SiC, simpler designs are generally more cost-effective and easier to manufacture to tight tolerances. Avoid sharp internal corners, which can be stress concentrators and difficult to machine. Generous radii are preferred.
- Wall Thickness and Aspect Ratios: Maintain adequate wall thickness to ensure structural integrity, especially for larger components. Very thin sections or high aspect ratios can be challenging to produce and handle without damage.
- Minimizing Stress Concentrations: Due to SiC’s brittle nature (low fracture toughness), it’s crucial to design components to minimize stress concentrations. This involves using fillets and radii at corners, avoiding sudden changes in cross-section, and considering load paths carefully.
- Integration of Features: Design for the integration of mounting points, holes, and channels where possible, rather than relying on secondary assembly operations. This can improve overall system stiffness and accuracy. However, the placement and machining of these features must be carefully planned.
- Thermal Management: Although SiC has low CTE, for ultra-high precision applications, even minor thermal gradients can matter. Consider how the component will be integrated into the larger system and how thermal loads will be managed. The high thermal conductivity of SiC helps in achieving thermal uniformity quickly.
- Joining and Assembly: If SiC components need to be joined to other materials (e.g., metals), the differences in CTE must be carefully managed to avoid stress. Techniques like brazing, adhesive bonding, or mechanical clamping are used, each with specific design requirements.
- Vibration Damping: SiC’s high stiffness means it has high natural frequencies, which is good for resisting vibration. However, in some dynamic applications, specific design features or integration with damping materials might be considered to manage system-level vibrations.
Manufacturing Processes:
The manufacturing of SiC components typically involves several stages:
- Powder Preparation: Starting with high-purity SiC powders (and additives/binders depending on the grade).
- Forming/Shaping:
- Pressing (Uniaxial, Isostatic): For simpler shapes.
- Slip Casting/Extrusion: For more complex or elongated shapes.
- Green Machining: Machining the component in its “green” (unfired) state when it’s softer and easier to shape. This is often done to get near-net shape before sintering.
- Sintering/Reaction Bonding: The formed part is fired at high temperatures to densify and achieve its final ceramic properties.
- Diamond Grinding and Lapping: Due to SiC’s extreme hardness, final machining to achieve precise dimensions and surface finishes is almost exclusively done using diamond tooling. This is a critical and often time-consuming step.
- Grinding: For achieving dimensional tolerances.
- Lapping and Polishing: For achieving very smooth and flat surfaces, especially for optical components or air bearing surfaces.
- Finishing and Cleaning: Final steps may include edge chamfering, cleaning, and inspection.
Sicarb Tech excels in this domain, leveraging its advanced material, process, and design technologies. Their integrated approach, from material selection to final product, supported by a top-tier professional team, allows them to meet diverse customization needs for industrial ceramic components. Their expertise in the hub of China’s silicon carbide customizable parts factories in Weifang City means they are well-versed in the nuances of SiC manufacturing, ensuring that designs are optimized for both performance and manufacturability. This capability is crucial for OEMs and technical buyers looking for reliable wholesale technical ceramics and custom SiC solutions.
Working with an experienced supplier like SicSino ensures that these design and manufacturing challenges are addressed proactively, resulting in high-quality, reliable SiC measurement tools that meet the most stringent specifications.
Achievable Tolerances, Surface Finish, and Calibration in SiC Measurement Tools
For silicon carbide measurement tools, the ability to achieve exceptionally tight dimensional tolerances and superior surface finishes is paramount to their functionality. The inherent properties of SiC, particularly its hardness and stability, allow for manufacturing to levels of precision that are difficult or impossible with many other materials. However, this requires specialized machining techniques and rigorous quality control, including meticulous calibration.
Dimensional Tolerances: Achieving tight dimensional tolerances with SiC is a testament to advanced machining capabilities. After the initial forming and sintering (or reaction bonding) processes, SiC components are typically near-net shape but require final machining using diamond grinding to reach the specified dimensions.
- Typical Tolerances: For standard precision components, tolerances in the range of ±0.01 mm to ±0.005 mm (±10μm to ±5μm) are commonly achievable.
- Ultra-Precision Tolerances: For critical applications like CMM reference artifacts, optical components, or semiconductor metrology parts, even tighter tolerances, sometimes down to ±0.001 mm (±1μm) or better, can be realized through meticulous grinding, lapping, and polishing processes.
- Geometric Tolerances: Equally important are geometric tolerances such as flatness, parallelism, perpendicularity, and cylindricity. For example, SiC optical flats or CMM guide surfaces can be manufactured to flatness values well below 1μm over significant surface areas.
Surface Finish: The surface finish of SiC components is critical for many measurement applications. Smooth, defect-free surfaces minimize friction, wear, light scatter (for optical uses), and ensure precise interfacing between components.
- Ground Finish: Standard diamond grinding can produce surface roughness (Ra) values typically in the range of 0.2μm to 0.8μm.
- Lapped Finish: Lapping with progressively finer diamond abrasives can improve surface roughness to Ra<0.1μm. This is often required for sealing surfaces or precision sliding components.
- Polished Finish: For optical applications (e.g., SiC mirror substrates) or ultra-smooth air bearing surfaces, polishing techniques can achieve exceptionally smooth surfaces with Ra<0.01μm (10 nm), and even down to the angstrom level for super-polished optics.
The following table outlines typical achievable specifications for custom SiC measurement components:
| Parameter | Standard Precision | High Precision | Ultra-Precision / Optical |
|---|---|---|---|
| Dimensional Tolerance | ±0.01 to 0.05 mm | ±0.002 to 0.01 mm | <±0.002 mm |
| Flatness (/25mm) | <5μm | <1μm | <0.1μm (or λ/10) |
| Parallelism | <10μm | <2μm | <0.5μm |
| Surface Roughness (Ra) | 0.2−0.8μm | 0.05−0.2μm | <0.01μm |
Calibration: Calibration is the cornerstone of any measurement tool’s reliability. For SiC measurement tools, especially reference artifacts like master gauges or CMM components, rigorous calibration traceable to national or international standards is essential.
- Process: Calibration involves comparing the SiC tool against a higher-accuracy standard in a controlled environment (typically a temperature-stabilized metrology lab).
- Frequency: The frequency of recalibration depends on the application’s criticality, usage intensity, and the operational environment. SiC’s excellent wear resistance and dimensional stability often lead to longer calibration intervals compared to tools made from less durable materials.
- Documentation: Comprehensive calibration certificates detailing the measured values, uncertainties, and traceability are crucial.
Suppliers like Sicarb Tech, with their integrated process from materials to products and their emphasis on measurement and evaluation technologies, understand the critical importance of achieving and verifying these tight tolerances and superior finishes. Their commitment to quality ensures that custom SiC parts meet the exacting demands of the precision measurement industry. They can assist customers in defining achievable specifications and implementing appropriate quality assurance protocols, including partnering with accredited calibration laboratories. This focus is vital for OEMs and technical buyers seeking high-quality ceramic components that perform reliably from day one.
Common Challenges and How to Overcome Them with SiC Measurement Tools
While silicon carbide offers numerous advantages for measurement tools, its inherent material properties also present certain challenges during design, manufacturing, and application. Understanding these challenges and implementing strategies to mitigate them is crucial for successfully leveraging custom SiC components. Partnering with an experienced SiC specialist like Sicarb Tech can provide the necessary expertise to navigate these complexities.
1. Brittleness and Fracture Toughness:
- Challenge: SiC is a brittle ceramic, meaning it has low fracture toughness. Unlike ductile metals, it does not deform plastically before fracturing. This can make SiC components susceptible to chipping or catastrophic failure if subjected to sharp impacts, high tensile stresses, or excessive bending moments.
- Mitigation Strategies:
- Design Optimization: Employ design principles that minimize stress concentrations, such as using generous fillets and radii, avoiding sharp corners, and ensuring even load distribution.
- Material Selection: While all SiC is brittle, some grades (e.g., certain RBSiC formulations) might offer slightly better toughness or impact resistance than others.
- Handling and Assembly: Implement careful handling procedures during manufacturing, assembly, and use. Provide protective packaging and clear handling instructions. Design fixtures and interfaces to avoid point loads or excessive clamping forces.
- Proof Testing: For critical applications, components can be proof-tested to screen out parts with sub-critical flaws.
2. Machining Complexity and Cost:
- Challenge: The extreme hardness of SiC makes it very difficult and time-consuming to machine. Final shaping and finishing almost exclusively require diamond tooling and specialized grinding, lapping, and polishing equipment. This can lead to higher manufacturing costs and longer lead times compared to metals or softer ceramics.
- Mitigation Strategies:
- Near-Net Shape Forming: Utilize forming techniques (e.g., green machining, precise molding) to produce parts as close to the final dimensions as possible before sintering. This minimizes the amount of hard machining required.
- Advanced Machining Techniques: Employ state-of-the-art diamond grinding technologies, ultrasonic machining, or laser-assisted machining where appropriate to improve efficiency and achieve complex features.
- Design for Manufacturability (DFM): Collaborate with the SiC supplier early in the design phase to optimize the component for easier and more cost-effective machining. Simplify geometries where possible without compromising function.
- Supplier Expertise: Choose suppliers with extensive experience and specialized equipment for SiC machining. Sicarb Tech, with its focus on process and measurement technologies, is well-equipped to handle complex SiC machining requirements efficiently.
3. Thermal Shock Sensitivity (Relative to Metals):
- Challenge: While SiC generally has good thermal shock resistance compared to many other ceramics (especially RBSiC), rapid and extreme temperature changes can still induce internal stresses leading to cracking, particularly in complex shapes or components with varying cross-sections.
- Mitigation Strategies:
- Material Grade Selection: RBSiC generally offers better thermal shock resistance than SSiC due to its microstructure and the presence of free silicon.
- Controlled Heating/Cooling: In applications involving temperature cycling, ensure that heating and cooling rates are controlled and within the material’s limits.
- Design Considerations: Design components to minimize thermal gradients and allow for uniform heating and cooling. Avoid designs that constrain thermal expansion unevenly.
4. Joining SiC to Other Materials:
- Challenge: Joining SiC to metals or other ceramics can be difficult due to differences in coefficients of thermal expansion (CTE). Mismatched CTEs can lead to high stresses at the joint interface during temperature changes, potentially causing joint failure or cracking of the SiC component.
- Mitigation Strategies:
- Brazing: Utilize active braze alloys specifically designed for ceramic-to-metal joining. Careful joint design and selection of braze material are critical.
- Adhesive Bonding: High-performance structural adhesives can be used, offering some compliance to accommodate CTE mismatch. Surface preparation is key.
- Mechanical Fastening: Design mechanical clamps or interference fits, but ensure that stresses on the SiC are well-distributed and controlled.
- Graded Interlayers: In some advanced applications, functionally graded materials can be used as interlayers to transition CTE between SiC and another material.
By acknowledging these potential challenges and proactively addressing them through careful design, material selection, and collaboration with experienced manufacturers like Sicarb Tech, the exceptional benefits of silicon carbide can be fully realized in demanding measurement tool applications. SicSino’s extensive technological capabilities and their role in advancing SiC production in Weifang provide a strong foundation for overcoming these manufacturing hurdles.
Choosing the Right Supplier for Custom SiC Measurement Tool Components
Selecting the right supplier for your custom silicon carbide measurement tool components is a critical decision that directly impacts the quality, performance, reliability, and cost-effectiveness of your final product. The unique nature of SiC and the precision required for measurement applications necessitate a supplier with specialized expertise, robust capabilities, and a commitment to quality. For procurement managers, OEMs, and technical buyers in industries like semiconductors, aerospace, and high-tech manufacturing, the vetting process is paramount.
Here are key factors to consider when evaluating a potential SiC component supplier:
1. Material Expertise and Grade Availability:
- Deep Knowledge: The supplier should possess in-depth knowledge of various SiC grades (SSiC, RBSiC, etc.) and their specific properties. They should be able to guide you in selecting the optimal grade for your application’s thermal, mechanical, and chemical environment.
- Material Quality & Consistency: Ensure the supplier has stringent quality control over their raw materials and manufacturing processes to guarantee consistent material properties from batch to batch.
2. Customization and Manufacturing Capabilities:
- Design for Manufacturability (DFM) Support: Look for a partner who can collaborate on design, offering DFM feedback to optimize for performance, cost, and manufacturability.
- Advanced Machining: The supplier must have state-of-the-art diamond grinding, lapping, and polishing capabilities to achieve the tight tolerances and fine surface finishes required for measurement tools.
- Complex Geometries: Assess their ability to produce complex shapes and integrate features accurately.
- Integrated Processes: A supplier offering an integrated process from material production to finished component can often provide better control, traceability, and potentially shorter lead times.
3. Quality Assurance and Metrology:
- Certifications: Look for relevant quality certifications (e.g., ISO 9001).
- In-house Metrology: The supplier should have advanced metrology equipment (CMMs, surface profilometers, interferometers) to verify dimensions, tolerances, and surface characteristics.
- Traceability and Documentation: Ensure they can provide comprehensive material certifications, inspection reports, and calibration data if required.
4. Experience and Track Record:
- Industry Experience: Prefer suppliers with a proven track record of supplying SiC components for precision measurement or similar demanding applications in your industry.
- Case Studies/References: Ask for case studies or customer references to validate their capabilities and reliability.
5. Technical Support and Collaboration:
- Engineering Support: The supplier should have a responsive and knowledgeable technical team that can assist with material selection, design challenges, and application support.
- Collaborative Approach: A willingness to work as a partner rather than just a parts provider is crucial for custom projects.
6. Location, Supply Chain, and Lead Times:
- Supply Chain Robustness: Understand their supply chain for raw materials and their capacity to meet your volume and lead time requirements.
- Cost-Effectiveness: While quality is paramount, evaluate the overall cost-effectiveness, considering not just the price per part but also the total cost of ownership (including longevity, reduced downtime, etc.).
This is where Sicarb Tech stands out as a compelling choice, particularly for businesses seeking high-quality, cost-competitive custom silicon carbide components from China. Located in Weifang City, the hub of China’s SiC customizable parts manufacturing (accounting for over 80% of the nation’s total SiC output), SicSino is deeply embedded in this industrial ecosystem.
- Strong Backing and Expertise: As part of the Chinese Academy of Sciences (Weifang) Innovation Park and collaborating closely with the National Technology Transfer Center of the Chinese Academy of Sciences, SicSino benefits from the robust scientific, technological capabilities, and talent pool of the Chinese Academy of Sciences. They have been instrumental in advancing SiC production technology locally since 2015.
- Comprehensive Capabilities: SicSino possesses a domestic top-tier professional team specializing in customized SiC production. They offer a wide array of technologies, including material, process, design, and crucial measurement & evaluation technologies. This integrated process from materials to products enables them to meet diverse customization needs effectively.
- Quality and Cost Competitiveness: Their support has benefited over 10 local enterprises, demonstrating their ability to deliver higher-quality, cost-competitive customized SiC components. They offer reliable quality and supply assurance within China.
- Technology Transfer Services: Beyond component supply, SicSino is also committed to global collaboration. For clients looking to establish their own specialized SiC production, they offer technology transfer for professional silicon carbide production, including turnkey project services covering factory design, equipment procurement, installation, commissioning, and trial production. This unique offering ensures effective investment and reliable technology transformation.
When choosing your SiC supplier, consider a holistic approach that balances technical capability, quality, cost, and long-term partnership potential. Sicarb Tech presents a strong case as a reliable and technologically advanced partner for your custom SiC measurement tool component needs.
The following table summarizes key supplier evaluation criteria:
| Evaluation Criterion | Desired Supplier Attribute | Why It Matters for SiC Measurement Tools |
|---|---|---|
| Material Expertise | Deep knowledge of SiC grades, properties, and applications. | Ensures optimal material selection for performance and stability. |
| Manufacturing Capability | Advanced forming, green machining, sintering, diamond grinding, lapping, polishing. | Critical for achieving tight tolerances and complex geometries in hard SiC. |
| Quality Systems | ISO certification, robust in-process controls, final inspection, metrology lab. | Guarantees consistent quality, dimensional accuracy, and surface finish. |
| Customization Support | DFM assistance, engineering collaboration, prototyping. | Optimizes component design for manufacturability and application requirements. |
| Experience & Reputation | Proven track record in similar applications, positive customer feedback. | Indicates reliability and ability to deliver on promises. |
| Technical Support | Responsive, knowledgeable engineers for problem-solving and application advice. | Provides valuable assistance throughout the project lifecycle. |
| Supply Chain & Logistics | Reliable raw material sourcing, capacity planning, on-time delivery. | Ensures project timelines are met and supply disruptions are minimized. |
| Cost-Effectiveness | Competitive pricing balanced with high quality and long-term value. | Delivers best overall economic benefit for the required performance. |
By carefully evaluating these aspects, you can identify a supplier like Sicarb Tech that not only meets your technical specifications but also becomes a valuable partner in your pursuit of precision.
Frequently Asked Questions (FAQ)
Engineers, procurement managers, and technical buyers often have specific questions when considering silicon carbide for measurement tool applications. Here are some common queries with concise, practical answers:
Q1: How does the cost of custom SiC components for measurement tools compare to traditional materials like stainless steel or granite?
A: Custom silicon carbide components generally have a higher upfront material and manufacturing cost compared to traditional materials like stainless steel or granite. This is due to the specialized raw materials, energy-intensive sintering processes, and the difficulty of machining SiC (requiring diamond tooling and longer processing times). However, the total cost of ownership (TCO) for SiC components can be significantly lower in many demanding measurement applications. This is because:
- Longer Lifespan: SiC’s superior wear resistance means components last much longer, reducing replacement frequency.
- Reduced Calibration Needs: Its excellent dimensional stability (low CTE, high stiffness) means less frequent recalibration, saving time and cost.
- Improved System Performance: Lighter weight (for dynamic systems) and higher stiffness can lead to faster measurements and greater throughput.
- Harsh Environment Durability: Resistance to chemicals and high temperatures avoids failures where other materials would degrade. Therefore, while the initial investment is higher, the enhanced performance, longevity, and reduced maintenance of SiC measurement tools often provide better long-term value, especially in high-precision, high-throughput, or challenging environments. It’s crucial to evaluate the TCO rather than just the initial component price.
Q2: What is the typical lead time for custom silicon carbide measurement tool components?
A: Lead times for custom SiC components can vary significantly based on several factors:
- Complexity of the Design: More intricate shapes, tighter tolerances, and complex features will generally require longer machining and inspection times.
- Component Size: Larger components may have longer sintering cycles and require more extensive machining.
- SiC Grade: Some grades might have longer raw material procurement or processing times.
- Quantity Ordered: Small prototype runs might have different lead times compared to larger production volumes.
- Supplier Capacity and Backlog: The chosen supplier’s current workload will influence delivery schedules.
- Post-Processing Requirements: Additional steps like coating or complex assembly will add to the lead time.
Generally, lead times can range from 6 to 16 weeks or more for fully custom SiC components. Simpler, smaller parts made from readily available grades might be on the shorter end of this spectrum, while very large, complex, or ultra-precision components will take longer. It’s essential to discuss lead time expectations early in the project with your supplier, such as Sicarb Tech, who can provide more accurate estimates based on your specific design and requirements. Building a good relationship with a reliable supplier can also help in managing and potentially expediting lead times for critical needs.
Q3: Can silicon carbide measurement tools be repaired or reworked if damaged?
A: Repairing or reworking damaged silicon carbide components is generally very challenging and often not feasible, primarily due to SiC’s inherent properties:
- Brittleness: If a SiC component is chipped, cracked, or fractured, the damage is typically difficult to repair in a way that restores its original strength and dimensional integrity. Unlike metals, SiC cannot be easily welded or re-formed.
- Hardness: Even if a minor rework (e.g., re-grinding a slightly worn surface) were attempted, it would require the same diamond machining processes as the original manufacturing, which can be costly and time-consuming.
- Structural Integrity: Any attempt to patch or fill a crack would likely create a point of weakness and compromise the component’s precision and reliability.
In most cases, if a precision SiC measurement component sustains significant damage, replacement is the most practical solution to ensure continued accuracy and reliability. Prevention through careful design (minimizing stress concentrators), proper handling procedures, and operating within specified load limits is the best strategy. For minor surface wear on some components, re-lapping or re-polishing might be theoretically possible if the wear is minimal and uniform, but this must be evaluated on a case-by-case basis by an expert SiC manufacturer. It’s crucial to discuss potential wear and damage scenarios with your supplier during the design phase to build in robustness where possible.
Conclusion: The Unwavering Precision of Custom Silicon Carbide
In the demanding realm of industrial metrology and high-performance applications, the quest for unwavering precision is unending. Custom silicon carbide measurement tools have unequivocally established themselves as a critical enabler in this pursuit. Their exceptional combination of dimensional stability, high stiffness-to-weight ratio, remarkable wear resistance, and resilience in harsh environments offers a performance ceiling that traditional materials often cannot reach. From the intricate stages of semiconductor manufacturing to the vast optics of aerospace systems and the robust demands of industrial CMMs, custom SiC components deliver tangible benefits in accuracy, longevity, and overall operational efficiency.
Choosing to invest in custom SiC is more than just a material selection; it’s a strategic decision to enhance measurement integrity, reduce long-term operational costs, and push the boundaries of what’s technically achievable. The journey, from initial design considerations through the selection of appropriate SiC grades and the complexities of manufacturing to exacting tolerances, requires expertise and collaboration.
This is where a knowledgeable and capable partner like Sicarb Tech becomes invaluable. Rooted in the heart of China’s SiC manufacturing prowess in Weifang and backed by the scientific might of the Chinese Academy of Sciences, SicSino offers not just components, but comprehensive solutions. Their integrated capabilities in material science, custom design, precision manufacturing, and rigorous evaluation ensure that businesses can confidently specify and procure high-quality, cost-effective silicon carbide measurement tools tailored to their unique needs. Furthermore, their commitment to technology transfer opens avenues for global partnerships and the establishment of advanced SiC manufacturing capabilities worldwide.
As industries continue to evolve and demand ever-higher levels of precision, the role of advanced materials like silicon carbide will only grow. By understanding its benefits and partnering with the right experts, engineers, procurement managers, and technical buyers can harness the power of custom SiC to build the next generation of highly reliable and accurate measurement systems, ensuring a competitive edge in an increasingly exacting global market. The future of precision is, in many ways, being shaped by the remarkable properties of custom silicon carbide.

About the Author: Sicarb Tech
We provide clear and reliable insights into silicon carbide materials, component manufacturing, application technologies, and global market trends. Our content reflects industry expertise, practical experience, and a commitment to helping readers understand the evolving SiC landscape.

